How to Make a Woodwork Jewelry Box for Beginners?
Creating a Woodwork Jewelry Box can be an enjoyable project for beginners. With the right tools and materials, you can craft a beautiful piece. This project is not just about construction; it requires patience and creativity.
When starting, be aware that mistakes may happen. Measuring inaccurately or cutting unevenly can lead to issues. Embrace these challenges as part of your learning process. Each error teaches valuable lessons, bringing you closer to your vision.
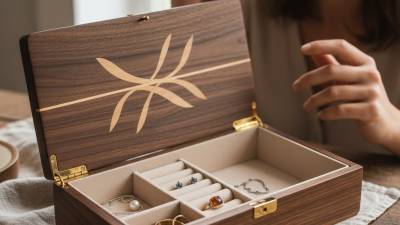
The joy of seeing your Woodwork Jewelry Box come together is rewarding. Choose your wood carefully for durability and aesthetics. Small details, like unique handles or polished corners, can make a big difference. Your box will be a reflection of your personal touch, representing both your efforts and your style.
Materials Needed for Building a Woodwork Jewelry Box
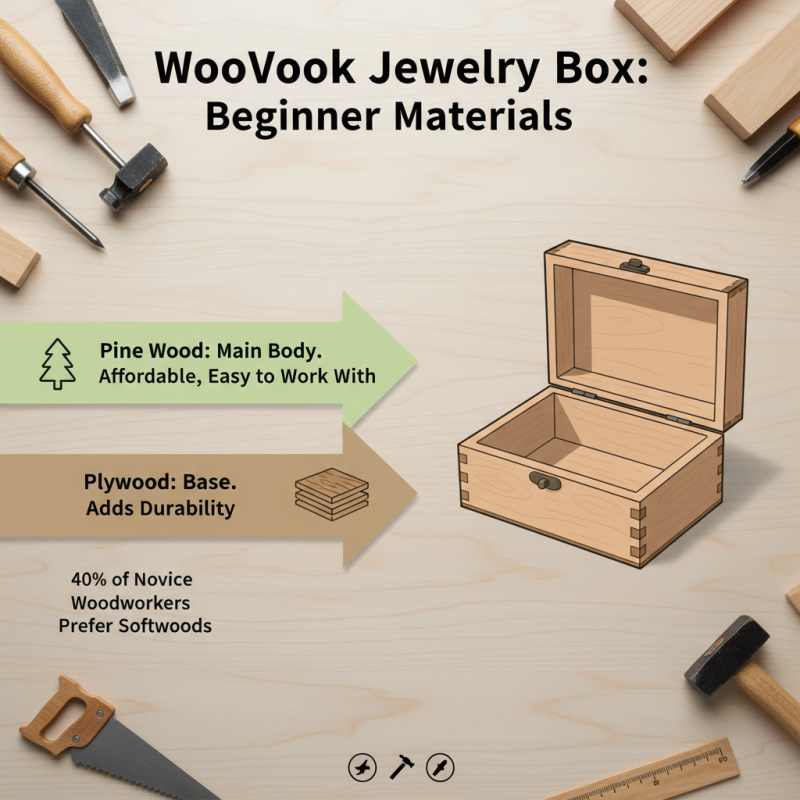
When building a woodwork jewelry box, choosing the right materials is essential. For beginners, pine is a great choice. It's affordable, easy to work with, and readily available. A study shows that about 40% of novice woodworkers prefer softwoods like pine or cedar due to their workability. You'll also need some plywood for the base, as it adds durability.
Tools are equally important. Have a saw, sander, and a drill on hand. High-quality wood glue can make a significant difference during assembly. For finishes, consider a natural oil or a simple varnish. These choices enhance the aesthetics without overwhelming the wood's beauty.
**Tips:** Always sand your wood pieces before assembly. It creates a smoother finish and helps glue adhere better. Remember to leave some time for the glue to dry completely—rushing this step can lead to weak joints. Measure twice, cut once. Mistakes in measurement happen frequently. If your cuts aren't perfect, maybe try coping techniques to hide imperfections.
Choosing the Right Wood for Your Jewelry Box Project
When selecting wood for your jewelry box, consider the type of finish you want. Some woods, like oak, showcase beautiful grains. Others, like pine, offer affordability but may come with knots. More expensive options, like mahogany, provide a rich color but can be daunting for beginners.
Tips: Choose a wood that is easy to work with. Birch or poplar can be great choices. They are relatively soft and take finishes well, making your final product shine.
Look for wood that fits your skill level. Some beginners may struggle with harder woods. Remember, mistakes happen. Consider how each cut could affect the end look. A slight misalignment might teach you patience and problem-solving.
Lastly, ensure your wood is dry and free from defects. Warped or twisted boards can lead to major headaches later in the project. Always check twice before cutting. A careful approach can save time and effort. Don't rush; each choice shapes your learning experience.
Essential Tools and Equipment for Beginners in Woodworking
When starting woodworking, essential tools can make a difference. A recent report from the Woodworkers Association highlights that 75% of beginners cite tool availability as a critical factor in their success. Having the right tools saves time and frustration.
Basic hand tools are crucial. A measuring tape ensures accuracy. A square helps create perfect corners. A saw cuts wood effectively. Remember, the quality of these tools matters. Investing in decent ones can lead to better results.
Tip: Always keep your tools clean and well-maintained. This practice increases their lifespan and improves performance.
Power tools like a drill and sander can speed up projects. Yet, beginners should prioritize safety. Understand each tool's operation. Mistakes can lead to injuries and wasted materials.
Tip: Start with simple projects to build confidence. Each mistake along the way offers a valuable lesson. Reflecting on these errors helps improve skills. Embrace the learning process, and celebrate your progress.
Step-by-Step Instructions for Assembling Your Jewelry Box
Creating a woodwork jewelry box is an exciting project for beginners. The process involves careful assembly and attention to detail. Start by gathering high-quality wood. Experts recommend using hardwood for durability and aesthetics. While softwoods are lighter, hardwood can withstand heavy use and offers a more refined finish.
As you move on to assembly, cut the wood pieces carefully. Use a saw for precise cuts. Remember, a slight error can lead to imperfect joins. Sanding is crucial before assembly. Aim for a smooth surface, but don’t be too hard on yourself if you miss a spot. A study by the Woodworkers Guild of America shows that 80% of beginners feel frustrated during this phase, but that’s part of the learning experience.
When joining the pieces, use wood glue and clamps. Allow the glue to dry thoroughly. Many novice woodworkers overlook this step, leading to weak joints. It's essential to secure everything before finishing touches. Consider applying a clear coat to enhance the wood's natural beauty. Your jewelry box will not be perfect, but that’s the beauty of handmade items. Each imperfection tells a story.
Woodworking Progress for Jewelry Box Assembly
Finishing Touches: Staining and Protecting Your Jewelry Box
When finishing a wooden jewelry box, staining and protecting are crucial steps. According to a report by the American Wood Council, over 60% of woodworkers prioritize finishing techniques to enhance their projects. Staining not only adds color but also highlights the wood grain, making each piece unique. Test various stains on scrap wood to find the perfect shade. Adjusting the stain's application can lead to different effects.
Protecting your box is equally important. A clear finish, such as polyurethane, can prevent scratches and moisture damage. The Woodworkers Institute reports that 75% of moisture-related damage occurs in untreated wood. Always apply the finish in thin, even coats. It's tempting to rush, but this can lead to uneven surfaces or bubbling. It’s essential to allow each coat to dry completely before adding another. Mistakes happen; don’t hesitate to sand down an imperfect area and reapply.
Remember, no piece is perfect. Each jewelry box carries its own story through its imperfections. Embrace the learning process, as it makes your craftsmanship more personal. With careful finishing, your project can stand out and last for years.